MAKING OWN PRINT TEMPLATES
It is worth to create your own templates when you use series of applications at your work, which contain e.g. data of employees. After creating the template which is filled out and contains data of the employee, you can print it out just by clicking one mouse button...
The structure of generated documents is get from the templates which are placed in the subdirectory "templates". You can edit the template by pressing the button Template Edit which is located in the window Templates . The files with a template have a WZR extension and can also be modified in any text editor (e.g. Notepad).
WARNING! Modifying the template has an influence on the appearance of documents (based on the template edit), which will be created in the future.
There are some templates attached to application (including example of an apllication form or templates of existing printouts)
There is also a possibility to create your own templates of documents which use data of employee and/or shifts. To create that template you have to generate a new file with any name and WZR extension (e.g. test.wzr) and open it in a text editor (e.g. Notepad). The template have to contain header and a content of the document. The new template file must be placed in "templates" folder.
Example of header:
<HEADER>
<TITLE>Example of header</TITLE>
<FONT_SIZE>12</FONT_SIZE>
<FONT_NAME>Tahoma</FONT_NAME>
<TYPE>htm</TYPE>
<FILE_NAME>@_grupa_nazwa,rozklad_ind,@_rok,@_miesiac_nr</FILE_NAME>
</HEADER>
TITLE: The title of the template appears on the templates dropdown list.
FONT_SIZE: Font size of the template (parameter required only for output .rtf documents)
FONT_NAME: Font name (parameter required only for output .rtf documents)
TYPE: Output document type (htm - allows to format any kind of text and input tables however it is a little difficult to edit or rtf - has less format options but is easy to further edit).
FILE_NAME: Generated file name. File name may contain some variables (e.g. put in variable file name @month will cause adding to file name a month name for which the schedule is create. It will allow to automatic save the created printouts of each month).
To place data of an employee into created document, you should use the variables. You can insert them in a template in any position.
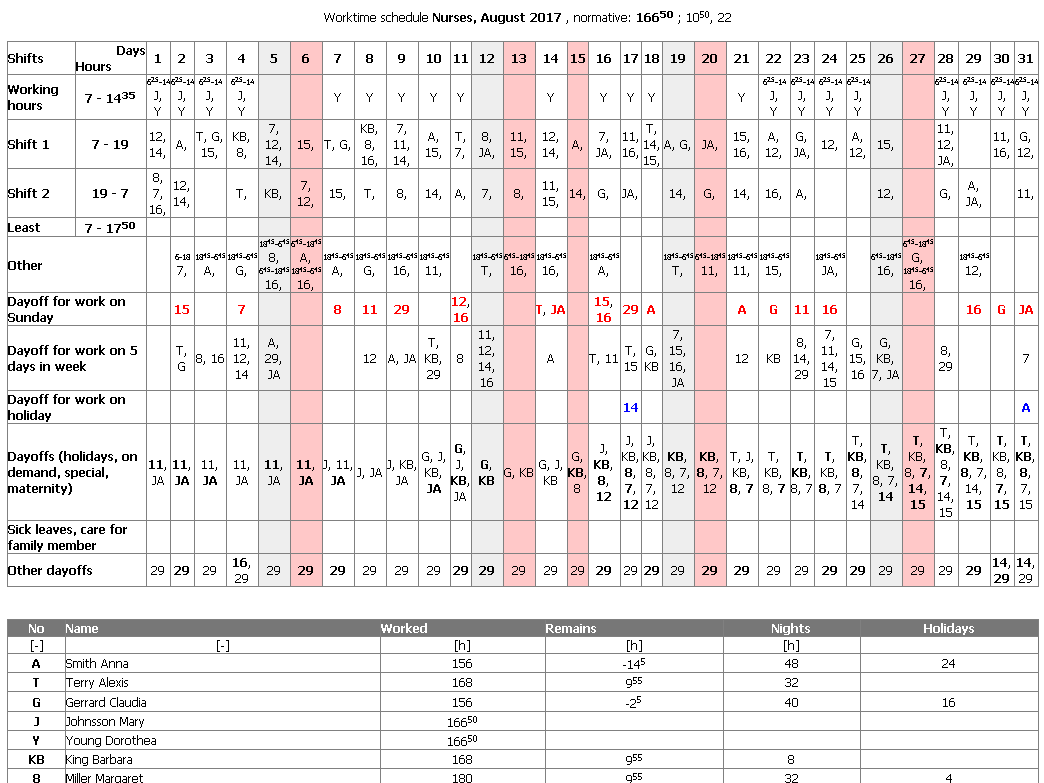
Examples of printouts:Worktime schedule 1
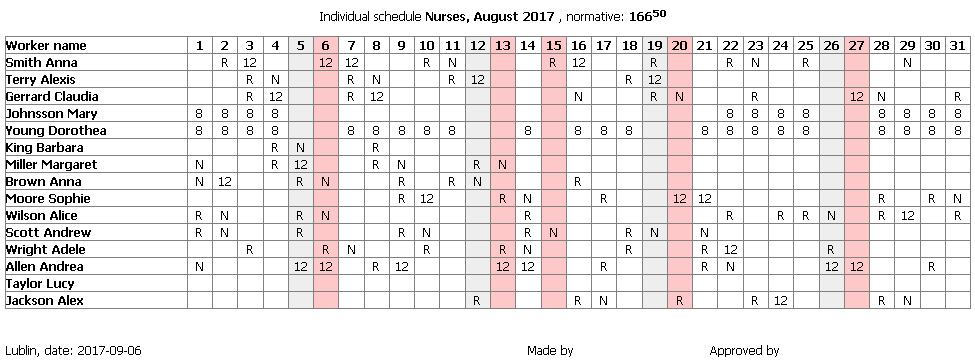
Individual schedule
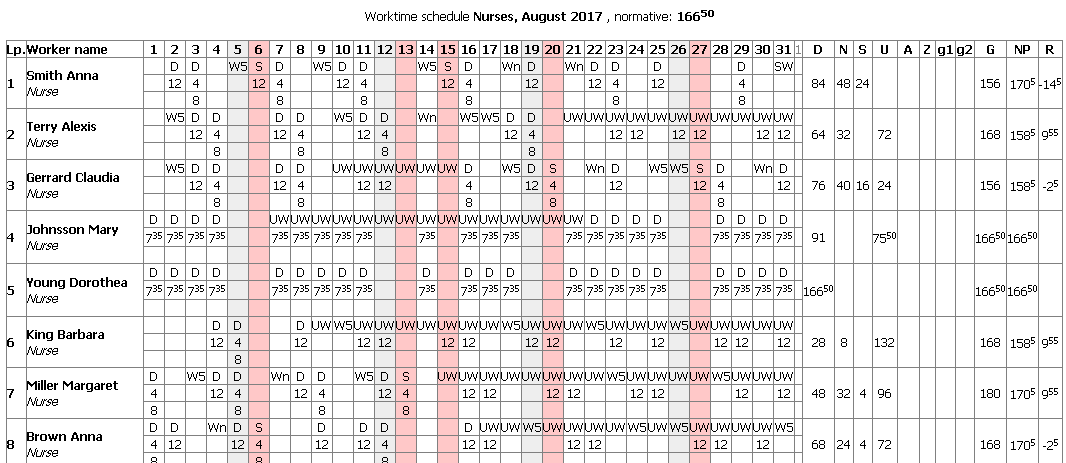
Worktime schedule 2
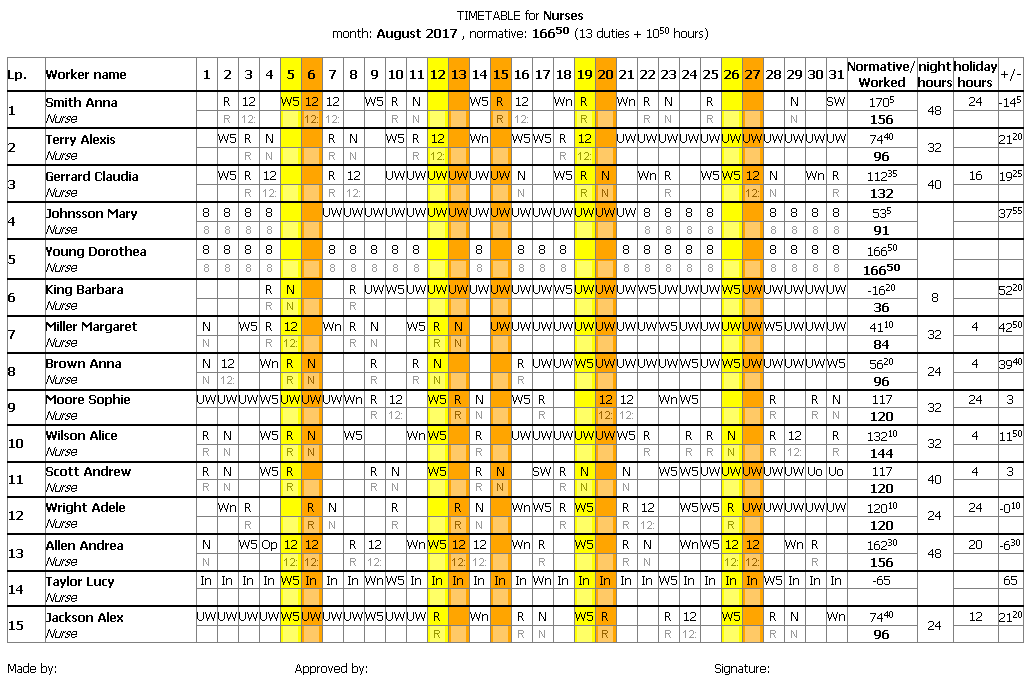
Timetable
Individual worktime card
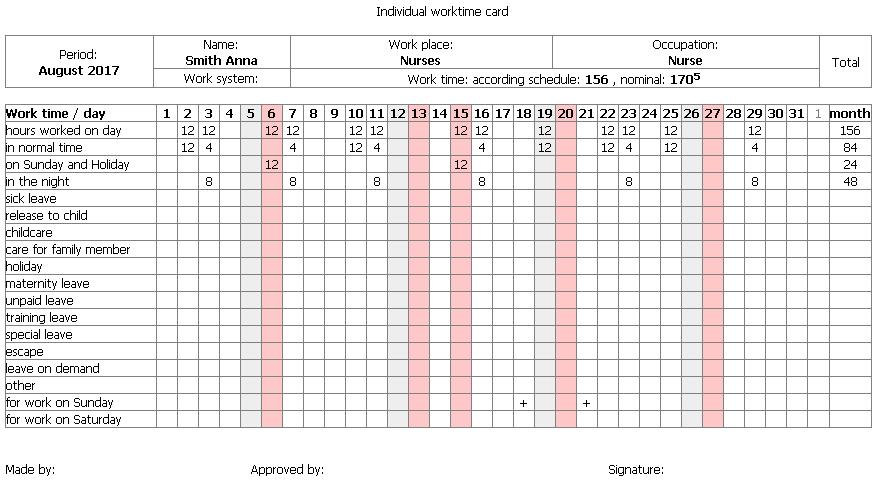
Attendance sheet
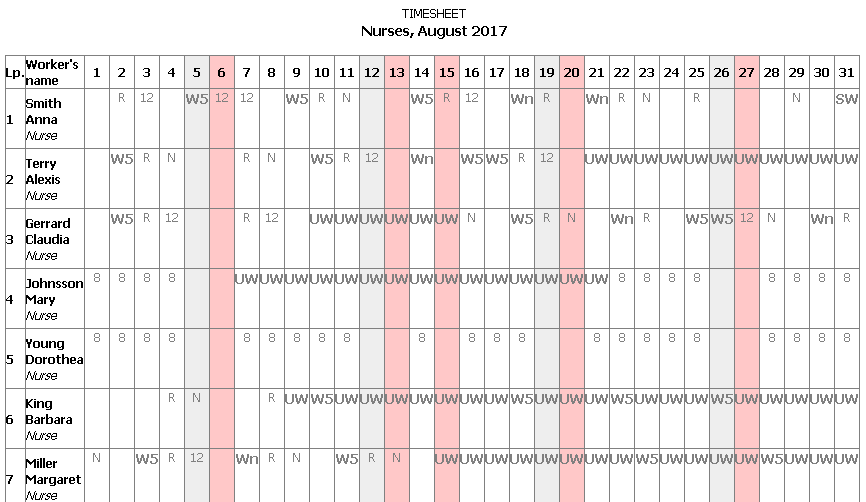
Overtime list

